There is a moment, just before the first cut, when everything becomes still.
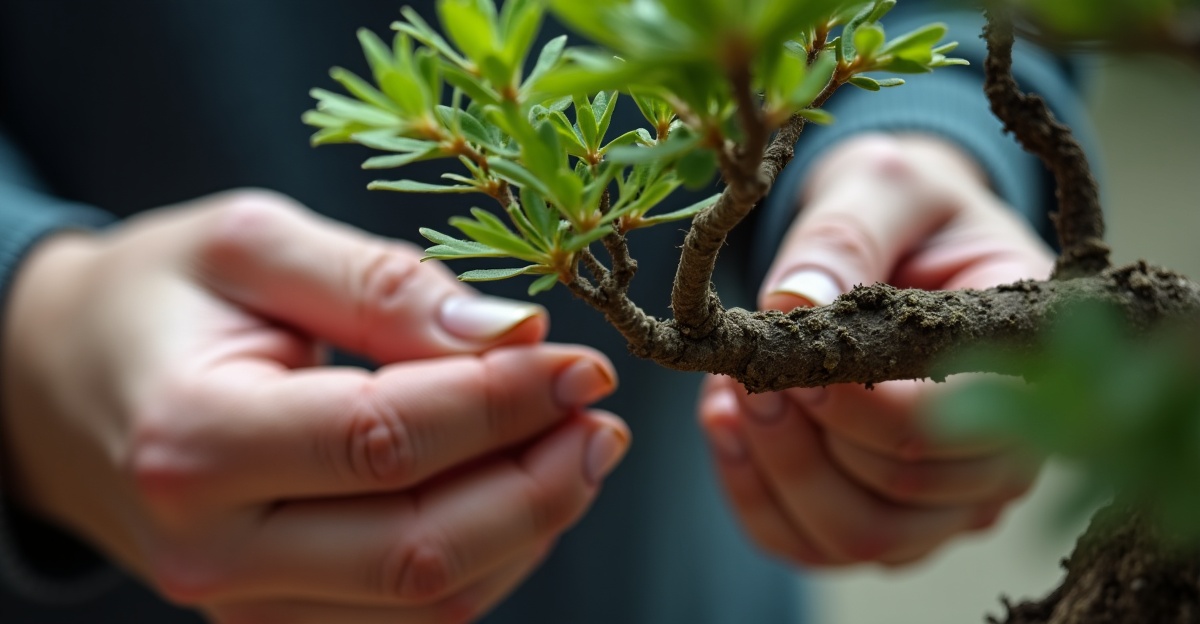
I have been practicing bonsai for twenty years, and I still feel it — that quiet before the shears meet the branch. Pruning is not simply a maintenance task. It is a conversation. You are listening to the tree, reading its energy, sensing where it wants to go. And then, with a clean cut, you help it get there.
In the tradition of wabi-sabi, we embrace impermanence. Nothing is fixed. The tree you prune today is not the tree you will prune next season. Each cut is both an ending and a beginning. This is why pruning, done with intention, is one of the most meditative acts in bonsai practice.
In this guide, I will walk you through everything you need to know about how to prune bonsai trees — from the philosophy behind each cut to the precise technique that protects your tree’s health and reveals its hidden beauty.
The Tools You Will Need
Before we begin, let us talk about tools. A poor cut with a dull blade causes more harm than no cut at all. The wound tears rather than slices cleanly, and healing is slow and ragged. Good tools are an investment in the health and longevity of your tree.
Here is what I recommend keeping in your kit:
- Concave cutters — These are the most important tool in structural pruning. The curved cutting head removes a branch flush to the trunk and creates a concave wound that heals over cleanly, leaving minimal scarring. Do not attempt structural work without them.
- Knob cutters — Designed for removing old stubs, knobs, and small dead branches close to the trunk. The rounded jaws create a bowl-shaped cut that heals exceptionally well.
- Pruning shears — Your everyday workhorse for maintenance pruning. Use these to pinch new growth, remove small twigs, and refine branch structure throughout the growing season.
- Cut paste (wound sealant) — Applied immediately after any cut larger than a pencil in diameter. It seals the wound against pests and disease, and helps the cambium layer heal evenly.
Clean your tools with isopropyl alcohol before and after each session. A contaminated blade can spread fungal or bacterial disease between trees.
Two Types of Pruning — Knowing the Difference Changes Everything
Many beginners treat pruning as one single act. But there are two fundamentally different approaches, each with a different purpose, a different timing, and a different level of impact on the tree.
Maintenance Pruning (Pinching)
This is the ongoing, gentle work you do throughout the growing season to maintain the shape and ramification of your tree. You are not removing major branches — you are managing new growth.
The goal is to keep the tree’s energy distributed evenly. When one branch grows vigorously and is allowed to run unchecked, it dominates. The weaker branches receive less energy and may die back. By pinching the strong growth regularly, you redirect energy to the weaker areas and encourage the fine branch structure that gives mature bonsai their characteristic density.
How to do it: Once a shoot has extended two to four nodes beyond where you want it, pinch or cut it back to one or two leaves. Use your fingertips for soft growth, shears for anything more established. Do this throughout spring and summer, as often as every two to three weeks during peak growth periods.
When: Spring through late summer. Reduce or stop in autumn to let the tree harden off before winter.
Structural Pruning
Structural pruning is the deeper work — the removal of entire branches to define or refine the overall design of the tree. This is where the real artistry lives, and also where the greatest risk lies if done carelessly.
When you remove a major branch, you are making a significant demand on the tree’s energy reserves. The tree must heal a large wound while simultaneously rebuilding its vascular network. This is why timing and aftercare matter so much.
When: For most deciduous species, late winter to early spring — just as the buds are swelling but before new growth begins — is the ideal window. The tree is coming out of dormancy, energy is rising, and the growing season ahead will support rapid healing. Avoid structural pruning in midsummer or deep autumn.
Step-by-Step: How to Structurally Prune a Bonsai Tree
Step 1: Assess the Tree’s Natural Movement
Set the tree on a turntable or rotate it in your hands. Look at it from every angle — front, sides, and back. What is the natural flow of the trunk? Where does the energy seem to move? Every tree has a “front” — the face that reveals its best character and most interesting taper.
Before you cut anything, spend five minutes just observing. I have students who rush to this step, and their trees always show it. The eye must be educated before the hand moves.
Step 2: Identify the Primary Branches
Primary branches are the main structural branches that define your design. In classical bonsai, the first branch is typically low on the tree and extends to the left or right — not directly toward the viewer. The second branch goes the other direction, slightly higher. The third creates depth by reaching toward the back.
These three branches form your skeleton. Everything else is secondary — and is a candidate for removal if it doesn’t serve the design.
Step 3: Remove Problem Branches First
Before any aesthetic decisions, remove what the tree doesn’t need:
- Dead branches — These will not recover. Remove them cleanly.
- Crossing branches — Branches that cross the trunk line or intersect with other primary branches create visual confusion and can cause rubbing damage over time.
- Downward-growing branches — In most styles, branches that grow straight down appear heavy and unnatural. Remove them unless they serve a specific design purpose.
- Parallel branches — Two branches emerging at the same height on opposite sides creates a “bar branch” effect that looks stiff and inelegant.
- Back branches pointing directly toward the viewer — These flatten the visual depth of the composition.
Step 4: Make Clean, Angled Cuts
Use your concave cutters for any branch thicker than a chopstick. Position the curved blade against the trunk and make a single, decisive cut. Hesitation leads to tearing.
The cut should be flush to the trunk — not leaving a stub, and not cutting into the trunk’s cambium. A slight concavity (curving inward at the cut surface) is ideal, as it allows the callus to grow over the wound from all edges simultaneously.
For very thick branches, you may need to reduce the branch in sections first rather than removing it all at once. This protects the tree from sudden energy imbalance.
Step 5: Apply Wound Sealant Immediately
As soon as each significant cut is made, apply cut paste. Cover the entire exposed wood surface. This is not optional — it is the difference between a wound that heals in one season and one that rots over three.
Traditional Japanese cut paste has a slightly antiseptic quality and seals out moisture while allowing gas exchange. Apply generously and don’t worry about appearance — the callus will grow over it.
Seasonal Timing Guide
Timing varies by species, and this is where many beginners go wrong. Here is a general guide:
- Deciduous trees (Maple, Elm, Beech, Hornbeam): Late winter to early spring, just before bud break. This is the safest and most effective window.
- Junipers (and most conifers): Spring or early autumn. Avoid midsummer heat and winter dormancy. Junipers are particularly sensitive to major pruning — never remove more than one-third of the foliage at once.
- Pines: Early autumn is best for structural work. Pines are slow healers and benefit from the full growing season following a dormancy period.
- Ficus and tropical species: Because they don’t have a true dormancy, they can be pruned year-round, but late spring — when growth is strongest — produces the fastest healing.
Common Mistakes to Avoid
In twenty years, I have seen the same mistakes made again and again. Here is how to avoid them:
- Over-pruning in a single session: Never remove more than one-third of a tree’s total foliage at once. The tree needs leaves to photosynthesize and support its healing. If major work is needed, spread it over two or three seasons.
- Pruning at the wrong time: Structural pruning in midsummer stresses a tree that is already working hard to sustain its summer foliage. In early winter, wounds won’t heal until the following spring. Both are poor choices.
- Using dull tools: A dull blade crushes and tears the cellular tissue at the wound edge. This dramatically slows healing and creates an entry point for disease. Sharpen your tools before every session.
- Skipping wound sealant on large cuts: This is the most common shortcut I see, and the most regretted. Any cut wider than 6-8mm should be sealed immediately.
- Cutting with the wrong tool: Using pruning shears to cut a large branch puts torque stress on the branch before the cut is complete, causing tearing. Use the appropriately sized concave or knob cutters.
Aftercare: The Week After Pruning
The days immediately following structural pruning are critical. The tree is in a mildly stressed state and needs support, not more challenge.
- Reduce watering slightly for the first three to five days. With fewer leaves to transpire moisture, the tree’s water demands are lower. Overwatering a freshly pruned tree can lead to root stress when the vascular system is adjusting.
- Move the tree out of harsh direct sun for one week. Bright, indirect light is ideal. Strong afternoon sun on a recently pruned tree desiccates the wound edges before callus can begin forming.
- Avoid fertilizing for two to three weeks after heavy pruning. The tree’s energy is directed toward healing, not growth. Adding nitrogen now may push rapid, weak growth that diverts from recovery.
- Watch for signs of distress: Wilting, yellowing leaves, or unusual leaf drop in the weeks after pruning can indicate the tree was pushed too hard. Move it to a sheltered location and reduce stress further.
A Final Reflection: Patience is the Practice
There is a phrase I return to often when I work with students who are eager to see the finished tree: the tree takes as long as it takes.
The impulse to over-prune — to cut boldly in hopes of fast results — is understandable. But the trees that endure, the trees that become extraordinary, are shaped slowly. Each pruning session is a single brushstroke in a painting that may take decades to complete.
When you pick up your concave cutters, remember: you are not just shaping wood. You are entering a relationship with a living thing that has its own timeline, its own character, its own response to your attention.
Prune with care. Observe more than you cut. And when you put the tools down, simply watch the tree breathe.
That is where the practice lives.