If you buy through links in this article, I may earn a commission at no extra cost to you.
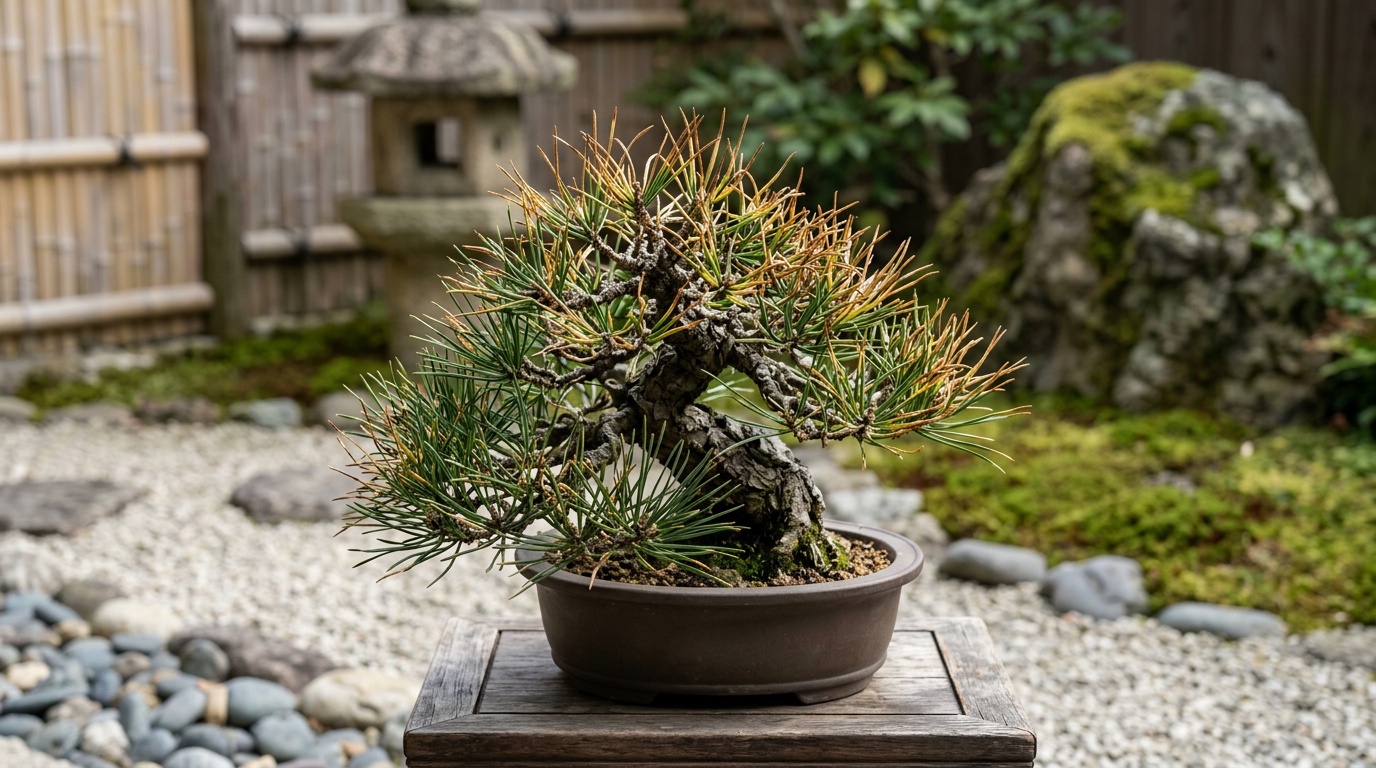
When I see yellow and brown tips on a bonsai, I check the root ball before reaching for fertilizer. The usual causes are uneven watering, roots staying wet too long, heat or wind scorch, and accumulated fertilizer salts; prevention starts with identifying which condition your particular tree is experiencing.
Across twenty years of practice, including training in Osaka and Kyoto, I have learned that the same damaged leaf can lead to opposite treatments. A thirsty maple needs water; a maple with struggling roots in saturated soil needs its drainage and growing conditions addressed. Leaf color begins the investigation, but it does not finish it.
1. Read the pattern before changing the care
Brown tissue is dead and will not turn green again. Yellow tissue may still be alive, but whether it recovers depends on the cause and how far damage has progressed. Your aim is to stop the injury spreading and protect the remaining foliage.
First identify the species, then note whether damage affects old leaves, new growth, the entire canopy, or only the side facing afternoon sun. Think back over recent changes: a missed watering, a stronger fertilizer dose, repotting, an indoor move, or several hot afternoons.
| What you observe | Likely explanation | What to check next |
|---|---|---|
| Crisp tips, curled edges, unusually light pot | Dry root ball or uneven wetting | Moisture below the surface and through the center |
| Yellowing and drooping while soil remains wet | Poor root aeration or root damage | Drainage, standing water, and recent root work |
| Scorched edges mainly on exposed foliage | Heat, sun, or drying wind | Afternoon exposure and recent changes in placement |
| Tip burn after feeding; possible white deposits | Excess soluble salts | Fertilizer concentration and irrigation water |
| Young leaves yellow between green veins | Possible nutrient availability or root problem | Species needs, substrate pH, and root condition |
| Fine speckling, webbing, sticky residue, or distinct spots | Possible pests or leaf disease | Leaf undersides and affected shoots |
These are clues, not diagnoses. A tree can have two problems together: summer heat may dry the pot rapidly, while concentrated fertilizer residue makes water uptake harder.
2. Correct watering by checking the whole root ball
When the soil is too dry
Feel beneath the surface and learn the difference between the pot’s weight after watering and its weight as it dries. An untreated wooden skewer inserted gently into an accessible part of the root ball can provide another clue. Do not force it through roots or rely on one reading from the edge.
If watering is needed, wet the entire surface slowly until water exits the drainage holes. Pause briefly, then repeat if necessary to wet areas the first pass missed. Runoff alone is not proof of success: water can escape along the pot wall while a compacted center stays dry. Bonsai Empire’s watering guide explains why watering frequency must follow the tree, substrate, and weather rather than a fixed schedule.
If a severely dried root ball actively repels water, briefly immerse the pot with water reaching just below the rim. Remove it once the root ball is wetted and let it drain fully. Treat this as a corrective measure, not an automatic daily soak.
In teaching, I often find that a student has watered faithfully but only wetted the top layer. A watering can with a fine rose helps spread water gently across a small pot. Technique matters more than the brand.
When the soil stays wet
If the root ball is still distinctly wet, adding water because the leaves look dry can worsen the problem. Roots need oxygen as well as moisture. Empty standing water from saucers or decorative outer containers, check that drainage openings are unobstructed, and keep the tree in suitable light with gentle air movement.
Do not force a waterlogged tree into complete dryness as a remedy. Resume watering according to actual moisture and species needs. Persistent wetness accompanied by worsening wilt or shoot dieback calls for closer assessment of the roots, ideally with an experienced local grower. Root color alone is unreliable; soft, deteriorating tissue and poor root structure are more meaningful.
3. Match light, heat, and humidity to the species
A bonsai is a tree trained in a container, not a single type of houseplant. The RHS bonsai guide distinguishes indoor subjects from trees that belong outdoors. Temperate species such as Japanese maple, juniper, and most pines need outdoor seasonal conditions. Bringing them into a dim room is not a dependable treatment for scorched foliage.
Japanese maple and other delicate deciduous foliage
Maple leaf margins can scorch when heat and wind drive water loss faster than roots can replace it, even when the soil is moist. Morning sun with protection from severe afternoon heat is often appropriate in hot climates. Move the tree away from reflective paving or a hot wall, and use an airy sheltered position rather than an enclosed corner.
The Japanese maple care guide from Bonsai Empire also recommends protection from strong sun during high temperatures. Adjust protection to your climate and cultivar; a delicate maple and a sun-adapted pine should not automatically share the same summer position.
Ficus and other tropical bonsai
For ficus indoors, examine light before assuming every yellow leaf means overwatering. A dim location slows growth and water use, so the same watering routine can suddenly keep the pot wet too long. Provide strong light appropriate to the species, avoid heating and air-conditioning drafts, and acclimate gradually when moving outdoors.
Dry indoor air can contribute to brown tips, but misting does not correct a dry root ball or provide sustained room humidity. If air is very dry, a room humidifier can be more useful. Iowa State Extension’s advice on brown leaf tips identifies humidity, inconsistent watering, and excess fertilizer among the possible causes.
On my own benches, the exposed side of a tree often shows trouble first. Before changing the soil mix, I look at where the afternoon sun falls and where wind passes between buildings.
4. Check fertilizer and water quality before adding nutrients
Yellowing does not automatically mean hunger. If symptoms followed feeding, check the label, dilution, frequency, and whether you combined several products. Organic fertilizer can also be overapplied. A white crust suggests deposits, although it cannot tell you by itself whether mineral levels are damaging.
Pause fertilizer while investigating active stress. If excess salts are likely and the pot drains freely, flush from above with several pot volumes of low-mineral water, allowing runoff to escape. Do not leave the container sitting in that runoff. University of Maryland Extension explains how mineral and fertilizer deposits interfere with moisture uptake and recommends leaching to reduce accumulation.
If drainage is poor, repeated flushing is not the first solution. Address the drainage problem. Rainwater from a clean collection system or reverse-osmosis water can help where irrigation water carries substantial minerals. Avoid sodium-softened water, and remember that leaving tap water overnight does not remove dissolved salts.
Azaleas require a different nutrient discussion
On an azalea, pale new leaves with greener veins can point toward iron becoming unavailable in an unsuitable root environment. Adding more general fertilizer may make matters worse. Check water quality and substrate acidity alongside root health. The Bonsai Empire azalea guide emphasizes acidic conditions and careful moisture management.
Kanuma is a useful substrate choice for azaleas at the appropriate repotting time. It is not a surface dressing that instantly reverses chlorosis. Resume an appropriate feeding program once the tree is stable and growing, following the product instructions.
5. Decide whether the roots need work
A pot that repeatedly sheds water around its edges, remains sodden unusually long, or dries much faster than before deserves investigation. Compacted substrate, a dense root mass, and drainage obstructions can all make watering unreliable. Recent root pruning is another clue: a reduced root system may struggle to supply foliage during heat or wind.
Do not unpot every tree with a few brown tips. First observe how water enters and drains, whether the tree is secure, and how moisture changes between checks. If those observations suggest a structural problem, plan root work around the species and its growth cycle. Many temperate deciduous trees are repotted near bud swelling; tropical trees are generally worked during warm, active growth.
For a future repot, choose substrate particle size and moisture retention to suit your climate, pot, species, and ability to water. More drainage is useful only if the resulting mix still holds enough available moisture between visits. A very coarse mix in a tiny pot can turn a manageable summer routine into repeated drought.
Rapid decline with suspected root decay may justify intervention outside the ideal season, but that decision needs an assessment of the actual roots. Avoid combining emergency root work with heavy pruning, defoliation, or major wiring. A struggling tree has little margin for several stresses at once.
6. Rule out pests and normal seasonal change
Use a hand lens to inspect leaf undersides, petioles, and shoot tips. Spider mites may produce fine stippling and webbing; scale or aphids may leave sticky residue. Separate a tree with suspected pests from nearby trees while you identify the cause. Choose treatment for the identified pest and species, following the label, rather than spraying because a leaf is brown.
Distinct spreading spots, lesions, or repeated damage on fresh growth deserve a closer look. The RHS guide to leaf damage illustrates how environmental injury and disease can produce different patterns. Photographs of both leaf surfaces and the whole tree help a local nursery or plant clinic assess an unclear case.
Also consider timing. Autumn yellowing on a deciduous tree is expected. Evergreens shed older foliage too, but browning active shoot tips or losing foliage throughout the crown is different from limited interior shedding. Normal turnover should make sense for the species, season, and location of the affected leaves.
7. Build a steady recovery and prevention routine
- Record the starting condition. Photograph representative leaves and note moisture, placement, feeding, and recent work.
- Correct the immediate mismatch. Thoroughly water a dry root ball, remove standing water, or shelter foliage from severe exposure as the evidence indicates.
- Check daily; water when needed. During hot or windy weather, check small pots again later in the day. In cool conditions, expect slower drying.
- Pause refinement work. Delay major styling and elective root work while active damage continues.
- Watch the direction of change. Compare photographs and inspect expanding leaves. Seek help promptly if wilt worsens, branches die back, or the root ball remains persistently saturated.
One lesson I repeat with students is to judge recovery by what happens next, not by yesterday’s damaged leaf. Further discoloration can appear after an earlier injury, and replacement growth depends on the season. A dormant tree may show its progress only when growth resumes.
For prevention, keep a simple note of how each pot behaves through changing weather. A shallow exhibition pot asks more of the grower than a somewhat deeper training container. If your routine cannot meet that demand, adjust the growing setup at the next appropriate opportunity. Healthy foliage gives you better aesthetic choices later.
Frequently asked questions
Should I cut off the brown tips?
You may trim dead edges for appearance with clean scissors, leaving a narrow brown margin rather than cutting into green tissue. Keep mostly green leaves because they still contribute to the tree. Do not defoliate a stressed bonsai to make it look tidy.
How often should I water a bonsai with yellow leaves?
There is no corrective calendar. Check moisture below the surface and water according to the species and root ball. Yellow leaves on a wet tree are not an instruction to add more water.
Will the damaged leaves recover?
Brown areas will remain brown. Some mild yellowing may improve, but injured leaves may eventually drop. Look for damage stabilizing and healthy growth when the tree is ready to produce it.
Can I leave a few imperfect leaves on the tree?
Yes. Once the cause is corrected, a scorched edge need not become another pruning task. I am comfortable letting a recovering tree carry evidence of a difficult week. Keep observing it, preserve useful foliage, and let the next season of growth restore the canopy.